I have been crafting Christmas outfits for several little girls I know and wanted to make sure that my daughter had something cute as well. I am really in love with felt designs right now and wanted to work that in somehow. I went with a simple, yet girly, reindeer idea. It is so simple that I wanted to share it with you!
Oh, and while I made mine a girly reindeer, this would also be super cute for a boy if you added a bowtie!
Materials List-
- Felt in beige, chocolate brown, red and black. I bought the pre-cut squares that are like $0.29 at Joann Fabrics. (The red I bought has glitter in it and is sparkly!)
- Steam-a-Seam paper
- Scissors
- Thread
- Ribbon (optional)
- Fray block for ribbon (optional)
- Reindeer Template- You can download it here. (Etsy crafters-feel free to use this design to sell!)
Step 1. Print the template out and trace onto the steam-a-seam paper following the packaged instructions. Make sure that the pieces are all traced seperately (see picture below).
Step 2. Loosely cut out traced shapes.
Step 3. Following steam-a-seam instructions, remove backing and place the paper onto the felt pieces with the sticky side down.
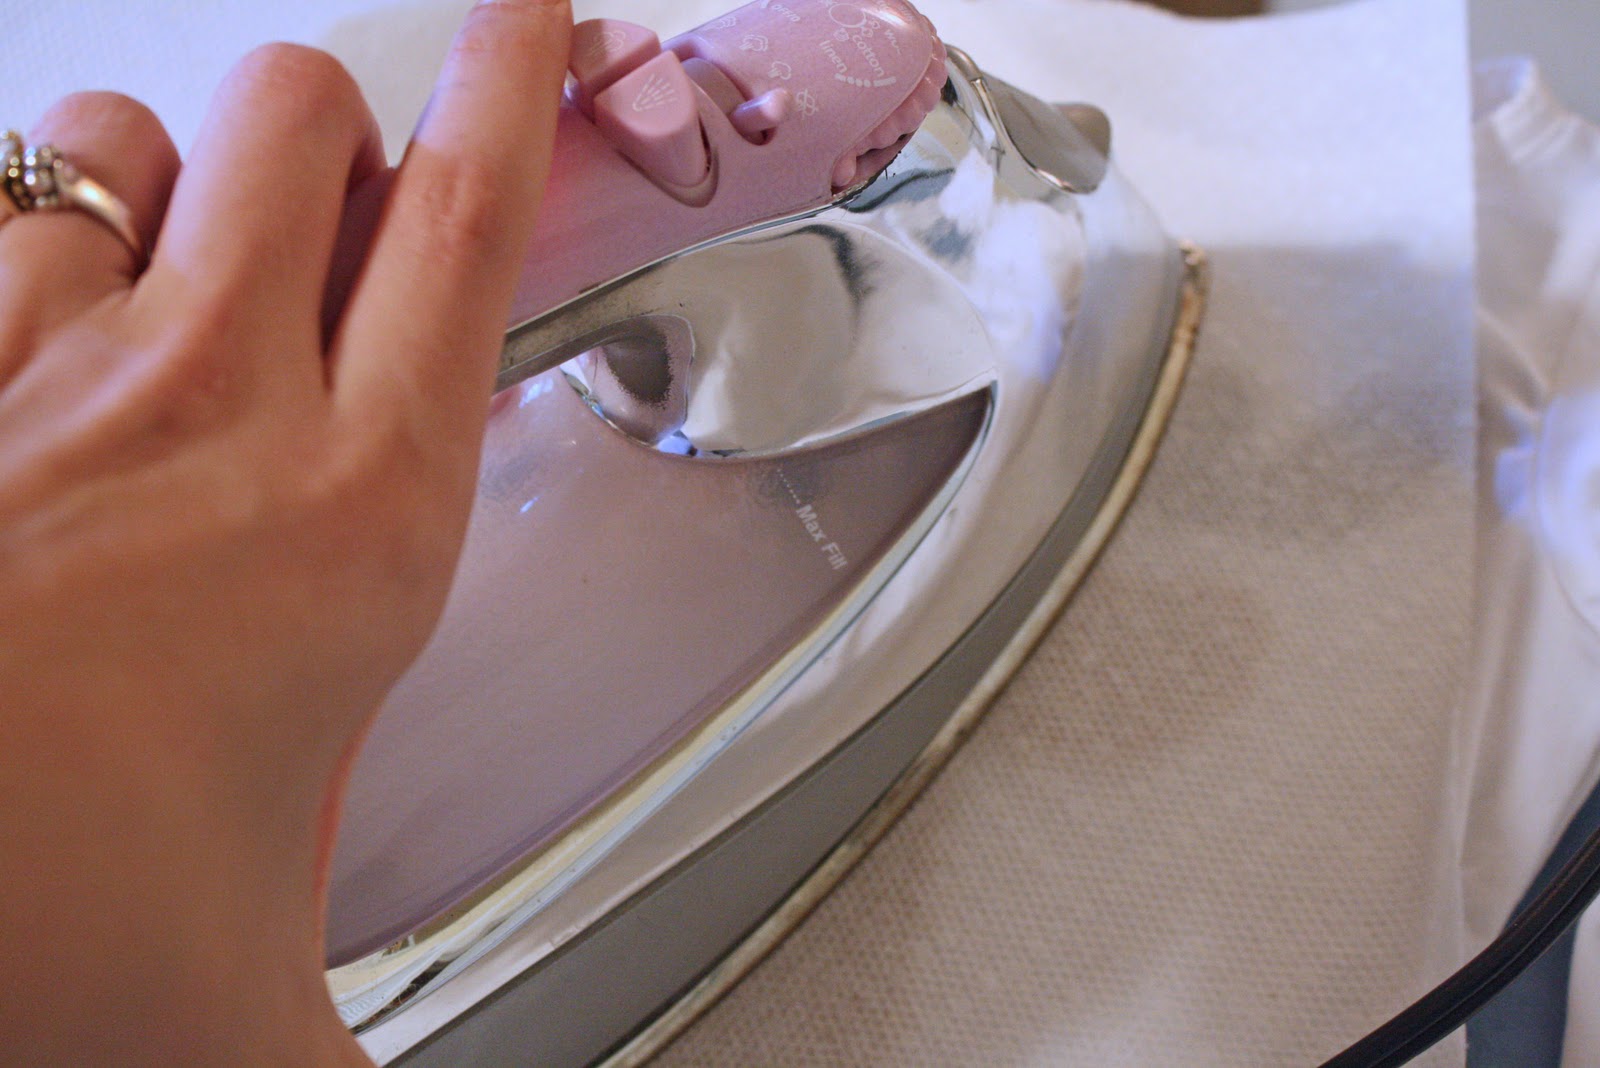
I like to place a paper towel over the paper to prevent pencil from smearing onto my iron.
Step 4. Iron each of the pieces into place.
Step 5. Cut out each of the shapes.
You should now have all of your pieces ready!
Step 6. Peel the paper backing away from each of the reindeer pieces.
Step 7. Layout the pieces of the reindeer onto your shirt.
Step 8. Iron the felt pieces into place on your shirt. Again, I used a paper towel to cover the image before ironing just in case. (I ironed the face and antlers first and then added the eyes and nose. I did this to make sure that nothing shifted while I was ironing).
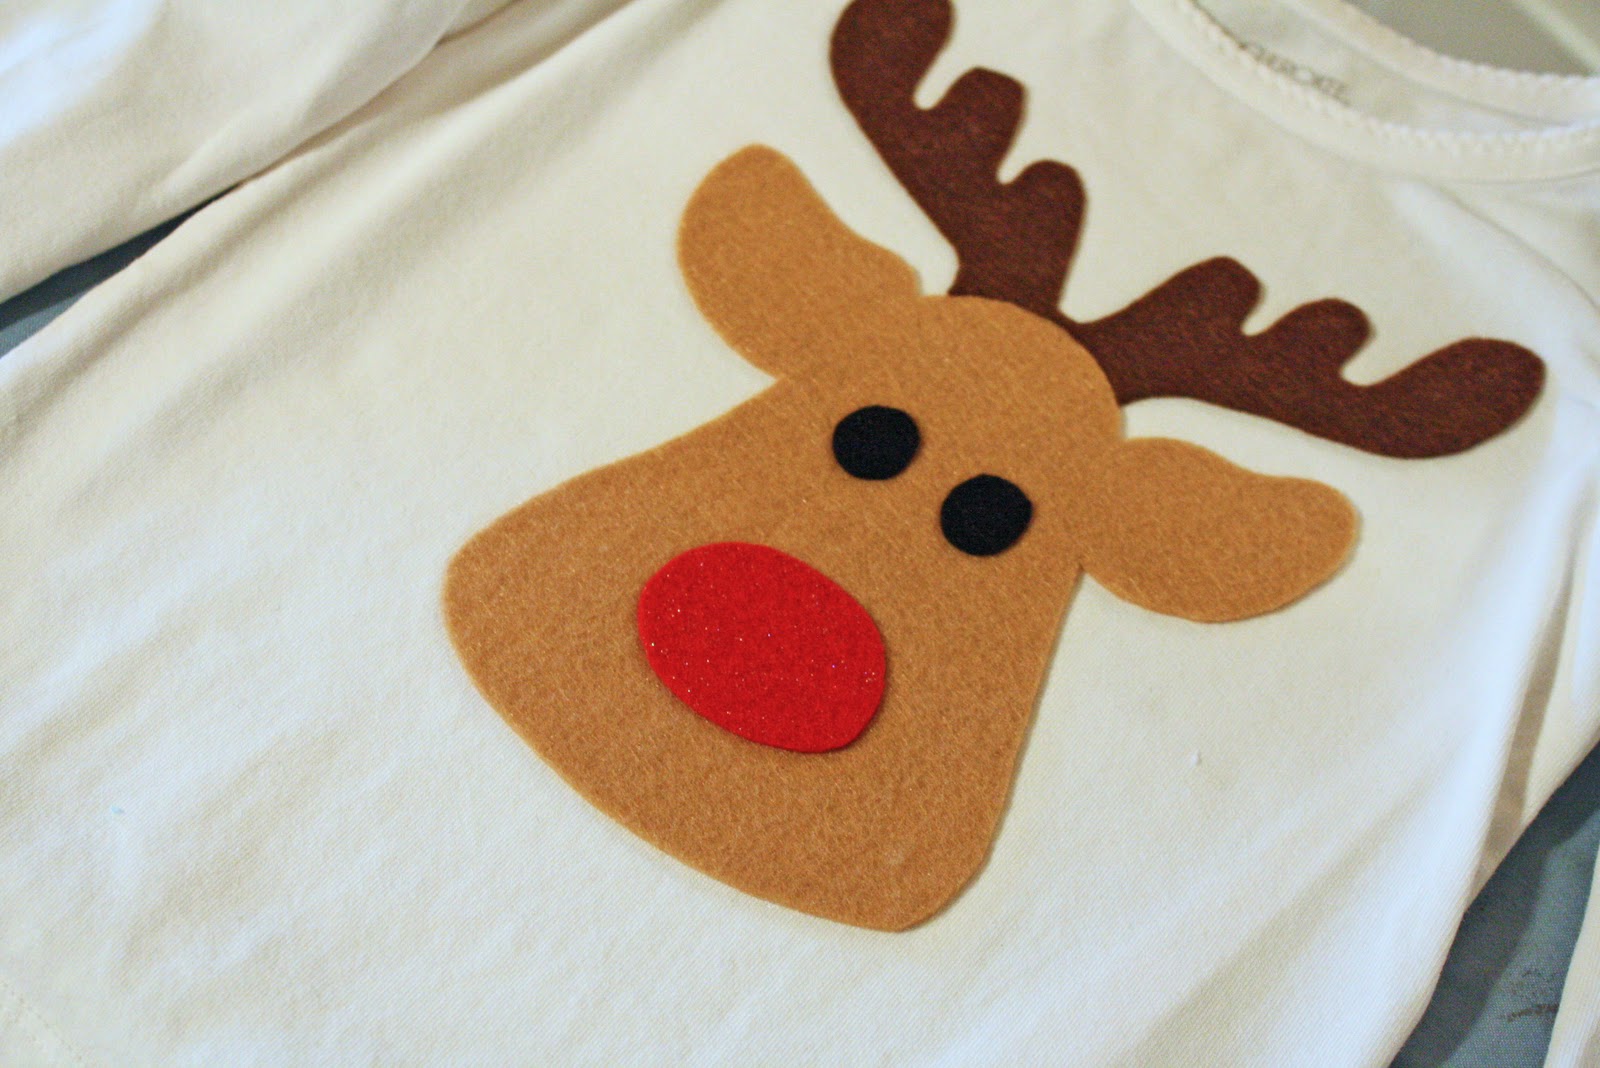
This is what your shirt should look like after everything is ironed into place.
Step 9. Now it is time to sew the pieces into place. Since felt does not fray, you do not need to use a zig-zag stitch. Instead use a simple straight stitch and sew 1/8" from the edge of the design. There are actually several ways to go about this. You could use thick embroidery thread and hand-sew the pieces on for a unique look. I chose to use my machine but extended the stitch length to twice the normal length. I also use a contrasting thread (bright white) to go around the face and add interest. It would also be cute to do a combination of the two.
Step 10. If you will be adding a girly bow, simply tie your ribbon and treat the ends with fray block (or heat treat if using grosgrain). I used the glue gun and added a dab of hot glue to the ribbon to hold it in place and then I went back and hand stitched it onto the shirt.
Voila! A super cute holiday tee that will make any little one smile.
PS- There are so many variations that can be done with this design. One might be to use funky colored quilting fabrics instead of solid felts...or a combination of both. Have fun!


28 comments:
This is absolutely adorable! Wish I had a little girl to make this for!! Maybe my son would like a guy reindeer. hmmm...
wow - that is soooo cute! I will be making one of these for my little girl! Maybe on a dress? Thanks for the tutorial and pattern!
Thank you for the template! I had these on my to-do list for this week. :)
aww very pretty! another project to add to my "to do" list (which is getting super long!) hehe
SO CUTE! I love your ideas. Question, How would you wash this? Won't the felt bleed?
So adorable! Thanks so much for the tutorial and template. I just bought some felt last week that will work :)
This is ADORABLE!! And I think I have all the stuff to make it on hand. Thanks so much for sharing Sabrina!!
There was a question about whether or not the felt will bleed...some felts do, but the felt squares (and most felts sold at Joann's) will not. If you want to be safe, just pre-wash the felts before you begin your project. Enjoy!
For boys, what about doing the antlers in plaid or camo?
I love this. Thanks so much.
Jeannine
This is so cute!! I linked to your tutorial over at Craft Gossip Sewing:
http://sewing.craftgossip.com/free-pattern-reindeer-applique-t-shirt/2010/11/19/
--Anne
This is too cute! Will be making some for my Girls soon! I featured you on my blog!
This is just adorable! SUPER cute idea! :)
-Tracy
www.naptimecraftmommy.blogspot.com
This is so gosh darn cute!!!! I luv the ribbon, it takes the whole idea up a notch. Thanks for sharing.
Love it. How does the felt hold up to wash and drying?
This is so adorable! Thank you for sharing the pattern! I am going to tempt this one!(I am not a sewer...want to be though!)
I just made these for my daughters, they love them and they turned out great, however I have the hardest time getting the stitch witchery to stick! A good thing I sewed everything on also! Thanks for the pattern and great idea! Oh, my 10 y/o also used the face pattern and attached it to a toilet roll covered in matching felt, gave it pipe cleaner legs and ta-da...a reindeer! How awesome!
Thanks very much for this sweet pattern! I'm going to use it with quilting cottons as an applique - really appreciate your kindness.
AHHHHHHHHHHHHHHHHH! This is fantastic! I hope you'll stop by and join my linky party :)
http://funkypolkadotgiraffe.blogspot.com/
So cute! I just made turkey dresses for my girls. I think they definitely need reindeer shirts now :o) Thanks for the idea!
What a cute shirt! I just had to make it for my daughter! She loves it and can't wait to wear it. Thanks for sharing your template!!!
Thank you so much for this great tutorial. I made one today for my great-nephew and added a bow tie... it came out so cute! You can check it out on my blog at www.sandysewz.blogspot.com.
This is the cutest Christmas shirt ever! I absolutely love it. Thanks for the great tutorial.
LOVE this -- going to make this tonight for my kiddos. Perfect for our Santa pics tomorrow!
thank you so much for sharing - I've turned it into a tree ornament which you can see on my blog
http://cupcakesandcustard.blogspot.com/2010/12/reindeer-no-i-think-its-snow.html
Thanks again, Lesley x
SUCH a cute shirt!!! Thanks so much for the great tutorial. I am pretty new to sewing still, so I am one of those bloggers that totally appreciates a good, long, chuck-full of pictures kinda tute!! ;)
I can't wait to go to the store tomorrow to get the felt and white shirts to make these! I have a 2 1/2 little girl, and I know she'd dig this. ;) THanks again.
Adorable! Seeing as I'm sewing challenged, I'd love to do this with freezer paper stencils! Thank you!
I wanted to share my version of this shirt that I blogged: http://feltorama.blogspot.com/2010/12/festive-felt-for-holidays.html
Thanks so much for sharing this delightful project with us!
Post a Comment