Monday, August 30, 2010

Featured Shop: Olives on a String

***This giveaway is now closed***


The featured shop this week is Olives on a String. Annie, the owner, is just precious and makes the most gorgeous things. She is obviously quite talented because when you look around her shop you will see a variety of things including artwork, pilots caps, hair pretties and even graphic design!

And because I love to share a little background on shop owners: Annie Reynolds grew up in an uber creative home in Southern California, but now resides in the East Coast countryside with her husband and three little girls. Interested in all things artistic, she loves to paint, draw, photograph, sew, embroider, crochet, knit and no longer thumbs her nose at glue-guns. She currently runs Olives on a String, an Etsy shop featuring hair accessories for the young and not-so-young, Scandanavian-style custom pilot caps for babies and children, and various forms of artwork.


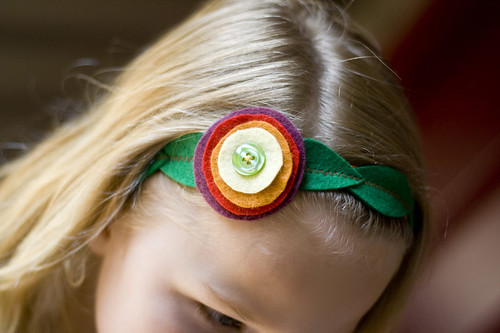
Annie has written an awesome tutorial for us! Check out this precious flower headband! You'd like to make one for your little darling, wouldn't you?

IMG_7952sm
The good news is, it only takes about 20 minutes from start to finish. Let's do this thing!

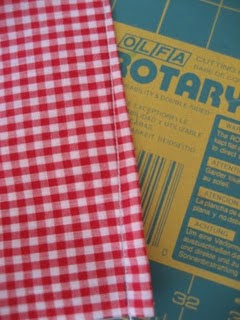
What you'll need: Everything shown below,
as well as a threaded sewing machine that can zigzag stitch.
IMG_7905sm
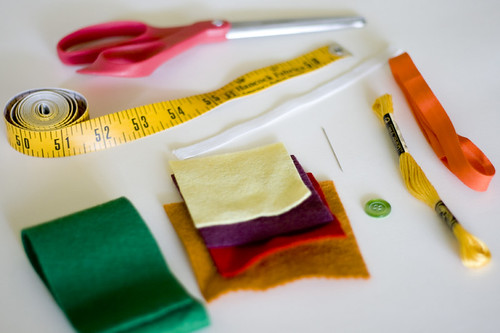
(Scissors, measuring tape, scraps of several different colors of wool felt, a strip of green wool felt about 16 inches long an 2.5 inches wide, a strip of bias tape (about 16-18 inches), a small strip (about 5 inches) of elastic as wide or just a little less wide than the width of the bias tape, a button, embroidery thread and a needle.)
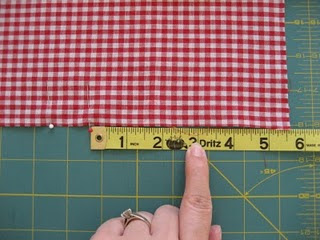
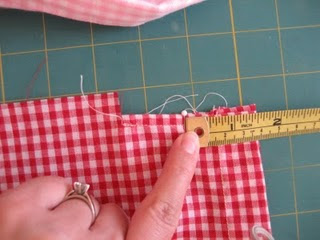
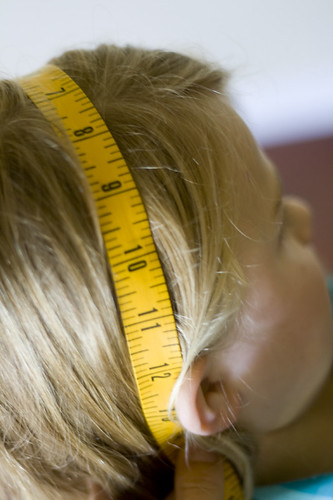
First measure the head of that darling of yours.
The strip of bias tape should be just a few (3-4) of inches shorter than that measurement.
IMG_7932sm
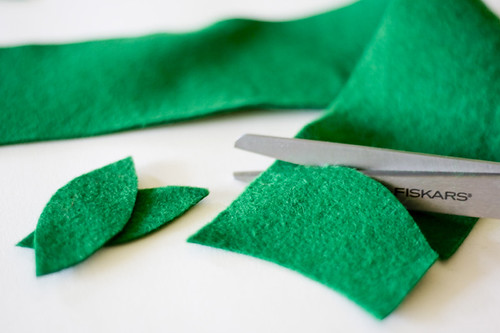
Next, cut leaf shapes out of the green wool felt in a horizontal row.
You'll end up with somewhere between 10 and 12.
You could also do this with pinking sheers for a jagged edge if you're wild and crazy like that.
IMG_7913sm
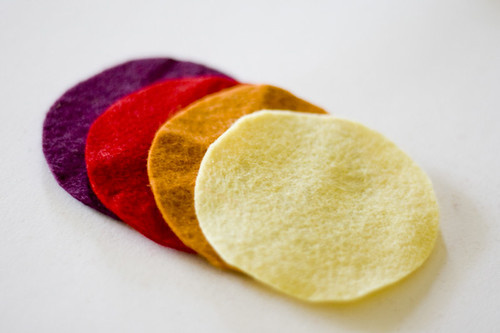
Next cut your scraps of felt into circles,
place the first circle on top of the next to use as a pattern if you want.
IMG_7918sm
Decide what order of colors you want your flower. Bask in the possibilities.
IMG_7923sm
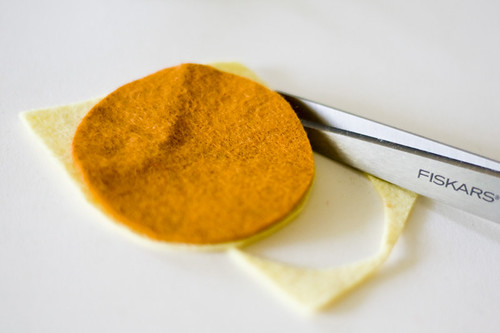
Trim the edges of the flower, getting smaller with each ascending layer.
IMG_7926sm
The circles don't have to be perfect. What's the fun in that, anyway?
IMG_7928sm
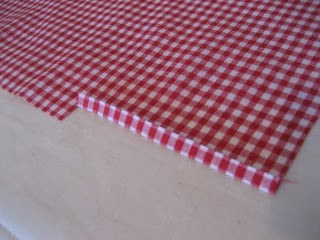
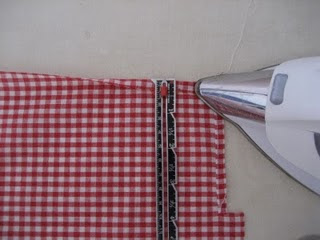
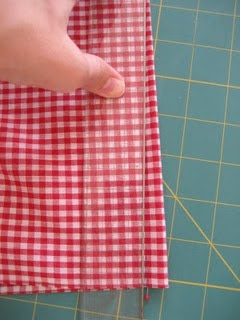
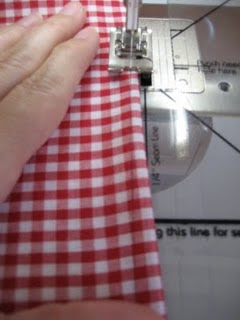
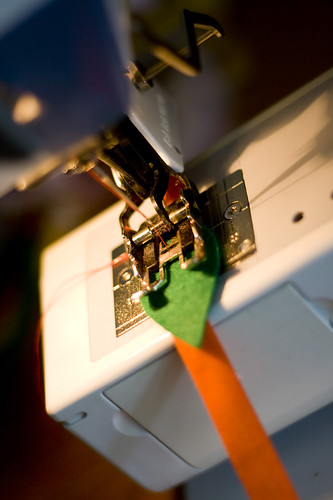
It's time to sew the leaves onto the bias tape, which will be the base for the headband.
If you have the option, set the width of the zigzag wide enough to sew together the underside flaps of the bias tape. Place a leaf about two inches from one end of the bias tape and zigzag stitch down, but do not sew all the way to the end of the leaf.
(A walking foot is shown here in the picture, but is in no way necessary. I was too lazy to take it off. That's the way I roll.)

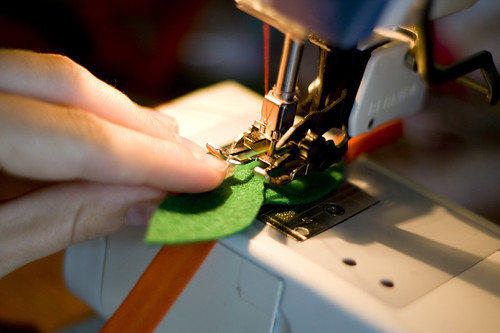
Be sure to leave about 1/4 inch of the leaf unsewn.
IMG_7936sm
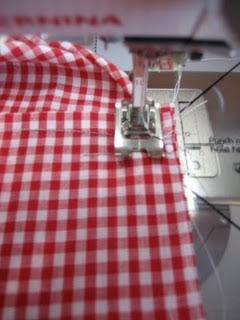
This next step you can do two different ways: You can slip the top end of the second leaf underneath the foot, being sure to overlap 1/4 inch of the second leaf
on top of the remaining 1/4 inch of the first leaf and continue zigzagging.
Or you can put your needle down, lift up your foot and overlap the second leaf on top of the first leaf, with 1/4 inch of the second leaf on top of the remaining 1/4 inch of the first leaf and continue zigzagging.
IMG_7937sm
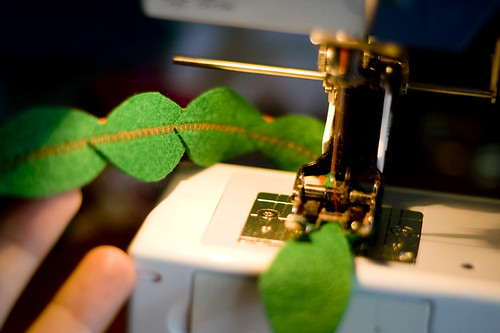
Continue overlapping the leaves and zigzagging them onto the bias tape until you reach about 2 inches from the end. You might have a leaf or two left over. That's ok.
Use it for your Adam and Eve costume this Halloween.
IMG_7938sm
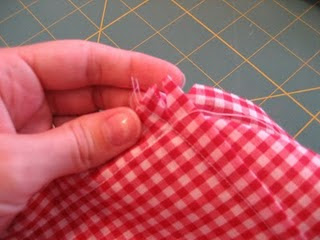
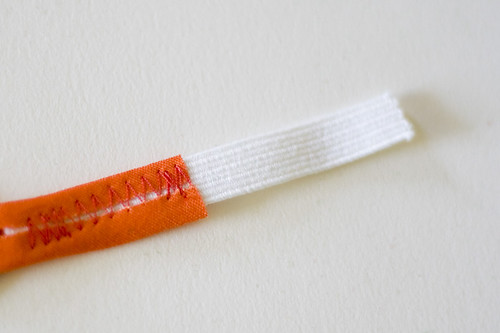
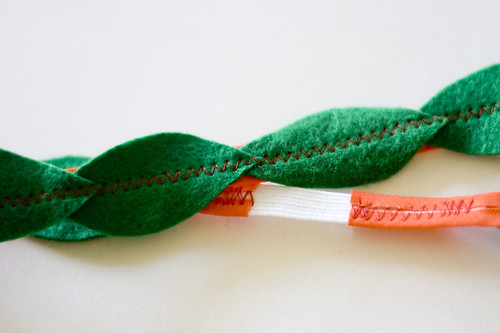
On one end of the headband, place about 1 inch of the elastic inside of the bias tape casing
and zigzag, leaving enough left to allow for some exposed and enough for the other end to go inside the casing. It should probably be a little more than what is shown here.
Woops. Learn from my mistakes, young grasshoppah.
IMG_7942sm
Now might be a good time to peel your darling away from her Polly Pockets
and fit the headband on her, seeing how much elastic you should use so it fits properly.
Keep her close by--you're going to need her adorable head again in just a minute.
Once you have that measurement and make any needed adjustments
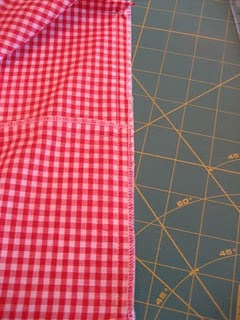
(like trimming the elastic, or in my case, ripping the stitches out and placing a longer piece of elastic in, arg!), place the other end of the elastic, again about 1 inch, inside of the bias tape casing and like before, zigzag stitch down, leaving at least an inch of elastic exposed
so that the headband stretches. It should look something like this when you're done sewing:
IMG_7947sm
Now have her try on the headband, making sure the elastic is centered in the back.
While she's putting it on, thread your needle with the embroidery thread.
Then grab your stack of circles and decide where to place your flower on the headband.
I'm a big fan of putting flowers on the side of the head, just below the part, flapper girl-style. Vintage is all the rage, people.
IMG_7948sm
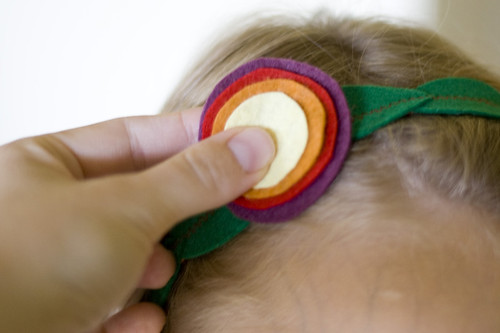
Use your fingers as a pin and keep the flower on the headband in the right spot while taking the headband off. With your free hand, place the button in the middle of the flower.
Sew the button onto the headband, sewing through the layers of felt, using the button to secure the flower onto the headband.
IMG_7951sm
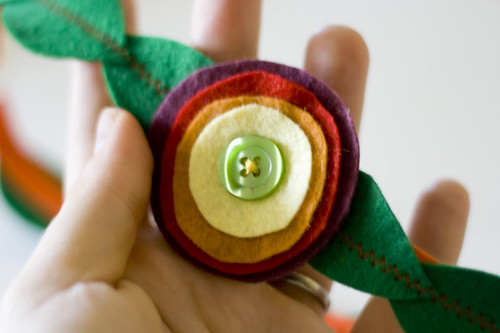
And there you have it! A cute mod flower and leaf headband. You're done!
IMG_7952sm

Olives on a String also has a giveaway for Noodles & Milk readers! One winner will get to pick a beautiful hair accessory of their choice from the styles shown below.

 To enter the giveaway, visit Olives on a String and come back here leaving a comment with your favorite item. The giveaway will remain open until Friday, Sept 3rd at midnight.

Annie has also generously offered free shipping on all orders to all Noodles & Milk readers valid
8/30/2010-9/5/2010! This will save you at least $5! Just enter "Noodles&Milk" in the comments of the order and she will refund your shipping charges.

Enjoy!


Photobucket

Friday, August 27, 2010

Fun Etsy Finds- Halloween

Did you know that you can find tons of Halloween-inspired goodies on etsy? Well you can! Let me show you a little of what I found...

Em & Sprout: How cute are these shoes?!?!?

Just Samantha: I know my princess would adore this over-the-top Halloween outfit!

Silk N Lights Designs: Gorgeous wreath to welcome guests

A Touch of Gray: An adorable handmade card to send out to friends


Mama Made: Personalized treat bag- great for using year after year

Petite Pear: These gift tags would be perfect tied onto party favors

Lovers Dover Clothing: How sweet is this little red riding hood costume?

Furry Paws Boutique: Don't forget to dress doggy up too!

Blue LaReve: I love the look of this pillow cover- innocent and festive at the same time.

Photobucket


Thursday, August 26, 2010

Giveaway Winner & Advertising Changes

First up, the winner of the Sew Sweet Stitches giveaway is...

Megan Silva!

The Silva's said...

My fav is the pink pearl cilp!!

August 25, 2010 3:26 PM


Now on to business...Advertising rates for the Noodles & Milk blog will be going up effective September 1. If you have been thinking about looking into this, then now is the time to do it. I will honor the current low rate as long as you contact me prior to September 1st.

Don't forget that your ad space includes a feature article and/or giveaway written for your shop. Features and giveaway's are excellent ways to get your shop more exposure!

Photobucket

Wednesday, August 25, 2010

Tips for Etsy Success- Pricing

It is obvious to most sellers (and buyers) that the retail price of an item is important. Too high and you won’t get any sales, too low and you won’t make any money (or worse, you could lose money).


While the importance of pricing is obvious, setting the perfect price is not easy, especially for new shop owners. When determining what to set your retail price at, it is important to consider the following things:

How much does it cost to make your item?

If you do not know the answer to this question, then you need to figure it out immediately. Make sure to include all materials AND your time into the equation. When adding the cost of materials, don’t forget to include packaging and paper materials such as business cards, hang tags, tissue paper, etc.

Adding up the cost of materials is easy. Figuring out what your time is worth is a little more complicated. The best bet for setting a dollar amount for your time is to pick a number (I started with $20 an hour) and use that across the board for all your creations. Work through making one item and time yourself. Then take that amount of time and multiply it by your set dollar-per-hour amount. If it took me 30 minutes to make an item at my $20/hour rate, then I added $10 to the overall cost of my item.


How much do comparable items on etsy retail for?

Do your research! Look around on etsy for similar items made by several different shops. Make a spreadsheet with your findings for comparison. Some items will be similar but have more or less features or differences than your items. Put all of these notes into your spreadsheet for comparison. When you are looking at similar items from other shops, it is also a good idea to look at the shops success rating. Personally, I like to research from shops that are well-established and successful. They are obviously doing something right, so why not take lead from them?

Set your price

Your retail price should be a balance between the true cost to make your item and the researched retails on etsy. If you have planned your items well, you should be able to set the retail at a reasonable price and subtract the cost of your item and have a profit (even if it is very tiny). If you run across the problem where your cost to make the item is higher than the retails you found on etsy then you need to re-think your materials. Are there items that you can buy in bulk at wholesale prices? Are there ways to cut costs on packaging materials? Are you charging too much for your labor?

On the other hand, if you come to a retail that you think is too high, take a minute to review it before lowering the price. If most comparable items on etsy have a similar retail, then you are probably okay. As a crafter, it is hard to look at retail prices for handmade items because we tend to look at them with “I could make that” glasses on. I used to have the same problem. I kept thinking that no one would pay $30 for my personalized baby blankets because I would not pay that for one. Well, I had to keep reminding myself that people that are not crafty don’t look at things the same way that I do. Turns out that my $30 baby blankets were my best sellers- I have sold hundreds of them and truthfully I probably could have sold them for a little more!
When you come to a number that you think is suitable for your retail price, review it again. Compare it to other shops on etsy. You don’t want to be the lowest priced item out there because it makes your shop look unprofessional. Charging $10 for a baby blanket when the average is $25 makes you appear to be unaware of the competition and not very business savvy. You also don’t want to be the highest priced shop out there either (unless your product is truly that much higher in quality). Setting your retail price at the highest end will not get your business off the ground because of the simple rule of comparison shopping. Most people want quality and a good price from a trusted shop. Seeing your shop with the highest retail and zero sales will not get you any business.

Pricing is a tricky thing and it often takes time to get it just right. In the course of 2 years in my etsy shop, I have modified (raised and lowered) retails a couple times. I am always staying on top of my competition and watching their moves and I am sure they are doing the same with me.

For additional help, here are some etsy articles on pricing.


Photobucket

Tuesday, August 24, 2010

Featured Shop: Honeyjane


This weeks featured etsy shop is Honeyjane. It is filled with snuggly soft things for baby. Melissa, the shop owner is a super sweet lady that has offered to share an amazing tutorial with us. We will get to that later but first lets meet Melissa!

Look at this family! Are they not precious?!?!

Here is what Melissa has to say about herself: "I started sewing when I was 10, my Mom is an amazing seamstress and for my first sewing lesson we made an outfit together: pants, shirt, and a vest. I would do little sewing projects here and there growing up. When I had my own kids, I became interested in sewing more regularly and have loved making quilts, blankets, clothes, and gifts these past five years".


"I started an Etsy shop last year because I thought it would be fun and a place to share some of the projects I love to make. The blankets I sell are, in my opinion, the perfect size and weight for swaddling a baby".


"I swaddled my babies until they were four months old and these have always worked the best for me. Also, I love to use designer fabrics. Alexander Henry, Sandi Henderson, and Valori Wells are among my favorite designers".


"I live in Southern California, and stay at home with my two girls, ages 5 and almost 3. I love to read, cook (I recently started a recipe blog), and of course, sew. ;) I like to post some of my projects I'm working on here (among other things)".

Now that we know a little about Melissa, here is the wonderful tutorial that she has shared with us. It is perfect for using in children's rooms, nursery's or around the house. Everyone has baskets and with this great tutorial you can now create some stylish new liners for them!

Basket Liner Tutorial

Materials Needed:

• fabric-for my size liner 2 1/2 yards was enough for three basket liners
• fusible interfacing, medium weight
• coordinating thread
• ruler
• cutting mat/rotary cutter
• pins
• sewing machine
• blind edge foot-if you have one
• seam gauge
• 1/2" ribbon-yardage depends on the size of your liner

1. Measure the basket you are lining. This tutorial will work best for medium to large sized baskets that are rectangular or square and do not taper in at the bottom. I am making a liner for a basket that is L11”xW11”xH9.5”.

Measurement A: Length

Measurement B: Width

Measurement C: Height

For the bottom piece, you will cut two of your fabric, and one of a medium-weight fusible interfacing. This will make the fabric nice and sturdy for the part of the liner that will fit in the bottom of the basket. Add ¼" to measurement A, and ¼" to measurement B, and this will be the dimensions you cut.

A + ¼” x B + ¼”

Mine measures 11 ¼ “ x 11 ¼”

For the sides of the liner – cut one long rectangle of fabric

Add 1 ¼” to the perimeter of the basket for width, and 6 3/8” to measurement C for heighth.

Length: A + A + B + B + 1 ¼”

Width: C + 6 3/8”

Mine measures 15 7/8” x 45 ¼” Here are my pieces all cut out and ready to be sewn:

2. Iron on the fusible interfacing to one of the bottom pieces. Make sure your iron is set to medium heat with no steam and that the glue bumps are facing the wrong side of the fabric.


3. Set aside bottom pieces for now.

4. On the short sides of the large rectangle piece, measure C + 2 1/8” from bottom and make a notch in the fabric a little more than ¼” in on both sides. Here is another picture to give you an idea of where to make the notch. Since my basket was 9 ½” high, I made a notch at 11 5/8”. (9 1/2" + 2 1/8" = 11 5/8)


5. Fold and press above the notch on both sides about 3/16". Fold and press over again another 3/16" to hide raw edge. Make sure you press the fold toward the wrong side of the fabric. It's kind of like a rolled hem, this will be where you tie the ribbon, so the ends need to be finished.

6. Topstitch along the narrow hem on both sides, make sure you backstitch at the beginning and end to keep the threads secured.
It should look like this:

7. You’re now going to make the ribbon enclosure. First, turn over 3/8” and press on the top length of the long rectangular piece. Use a seam gauge to be as accurate as possible.

8. Then, turn over 7/8” and press. The enclosure will be 7/8” when finished, and will hold a ½” ribbon.


9. Topstitch ribbon enclosure closed, make sure you backstitch at both ends. I like to use a blind stitch foot when doing this, it's really helpful and makes edge stitching a lot quicker and more accurate.


It should look like this where the ribbon will go:

10. Now we're going to work along the bottom edge of the large rectangle piece. We are going to be making four darts (one for each corner of the basket), so we need to pin or mark with a fabric marker where the darts will go. This will make it so your basket liner will be nice and fitted on the inside, since the liner has to be larger at the top to fit over the basket. And it's necessary so the large piece will fit just right when sewed to your bottom piece.

Your first measurement: Subtract 1" from your length first, then take half of that, and add 5/8". 1/2(A - 1") + 5/8" Mine is 5 5/8", since my length is 11" (11-1=10, 1/2 of 10 = 5, add 5/8" =5 5/8") Mark that measurement from the side, it doesn't matter if you start from the left or right, I started from the right.


From that pin, measure your width minus 1" (B - 1"). My width is 11", so I measured 10" from the 2nd pin. Mark with a pin or marker, and measure 1" from that pin. You have marked two darts so far. From the last pin, measure your length minus 1" (A - 1"), and then measure and mark 1" from that mark (the third dart). Then measure your width minus 1" (B-1") and measure 1" from that (the fourth dart). You now have marked all four darts. Your remaining measure of fabric should equal your starting measure of fabric (mine was 5 5/8"), give or take 1/4" and you should have a total of 8 pins, or 8 marks.

This picture is measuring from the first to the second dart:

11. The darts will be 8 1/8" long. So now you need to measure up from the middle of each 1" dart to 8 1/8" and mark with a pin or fabric marker.


12. To see where you're going to sew the dart, take a ruler and fold the dart so that the two pins or marks are on top of each other (on wrong side of fabric). Mark a line from the 8 1/8" mark down to one of your pins, don't remove the pins, you'll need them to line up the fabric correctly at the sewing machine. It should look like this:


13. Sew all four darts along the line you drew. Start from the top, backstitch, and go down to the bottom. I'm starting the seam at the top in this picture:

Each dart should look like this when finished:

14. Press each dart open, it will look like this on the wrong side of the fabric:

15. We are now ready to sew the sides together of the long rectangular piece so that it can be attached to your bottom piece. Mark 1 1/2" from the top, or ribbon enclosure, this is the point to where we'll sew the sides together. If we sewed all the way up, we wouldn't be able to put the ribbon in and tie it!

16. Sew the short sides of the long rectangular piece (right sides facing) together using a 5/8" seam. When you reach the finished seam (above the notch), you are going to gradually sew off the fabric, remember to backstitch!


It will look like this:

17. Snip threads. The top of your liner will now resemble this:


18. Finish your edge by serging it, using pinking shears, or a zigzag stitch. If you have a serger, it will look like this:

19. You are now ready to sew the top piece to the bottom piece. We will do this one side at a time. Layer your bottom pieces so the interfacing is in the middle and the right sides of the fabric are facing out.

20. The four darts are going to match up with the four corners of your bottom piece. We have to sew and finish the edges one side at a time. We're going to start with the side that has the seam between the two darts. You're going to pin this to the width side of your bottom piece. It's not going to match up exactly, but don't worry. Just pin it so the dart seams are equally far away from the edges of the bottom piece.

21. You're going to sew a 5/8" seam, remembering to backstitch at the beginning and end of the seam. Start at the first dart seam, not the edge of the fabric! And end at the second dart seam (not the edge!).

You have now sewed the first side, time to finish the edges of the fabric.

22. So that the fabric doesn't pull when sewing the next side, you're going to make a notch at either end of the fabric, but just on the top rectangular piece, not the bottom.

23. Now finish the edge.

24. Turn the fabric and pin your next side (the length). Again, your fabric will not reach all the way to the end, the seam of your dart should be about 5/8" away from the edge of the fabric. Sew from dart seam to dart seam, backstitching at the beginning and end. Finish raw edges. Do this twice more, until your large rectangular piece is sewed to the bottom piece on all four sides. Snip threads. Almost done!!

25. The last step is to pull your ribbon through the ribbon casing. Use a safety pin, and feed it all the way through. Burn the ends or set with fray check. Now it's ready to go into your basket!

Though this tutorial is a little complicated at first because of all the measurements, it only took me 1 hour to do 2 of these liners once I had all my measurements in place and the experience from making the first one.

I hope you enjoyed this wonderful tutorial shared with us by Melissa at Honeyjane! Now, go visit Melissa's blog and tell her how much you enjoyed her tutorial. Thanks Melissa!


Photobucket

 
Simply Yours Designs Cute Blogger Templates